Tiles – the ideal floor covering
Certain types of flooring require specific uses. This is why carpets will never be found in bathrooms or garages. Tiles, on the other hand, are real all-rounders, covering the whole range of wall and floor application. Whether in the kitchen or bathroom, in the hallway, cellar or on the terrace – tiles can be used just everywhere. When installing tiles, you should however follow some practical tips and make sure to use the right products.
Tip 1: Careful substrate preparation
Proper substrate preparation is of key importance before installing tiles. The substrate should be level, sound, clean, dry and free of adhesive residues. Especially with large tiles pay attention to uneven floor areas. If necessary, they must be smoothed over with a levelling compound. Also a primer may be necessary: either a deep-penetrating primer (e.g. for cement) or an adhesive primer (e.g. for concrete) depending on the substrate. In wet rooms, priming should be done along with the waterproofing. When selecting tiles, it is advisable to take the later use or function of the room into account. The lower level of wear in bathrooms requires abrasion resistance class 3, while the higher wear level in garages requires resistance class 5. It is recommended to buy one tenth more tile material than required by the number of square meters. This takes the cutting waste into account and ensures a sufficient amount of spare material in case of later damage.
Tip 2: Tile installation and joint widths
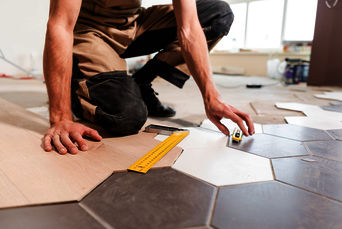
Inexperienced do-it-yourselfers are advised to start tile installation in the middle of the room and to proceed in parallel rows from the inside to the outside. Tiles that have been cut to size are less noticeable at the edges. A diagonal pattern creates a nice visual effect but is more demanding. It is especially recommended for square rooms and helps to hide crooked walls. In addition to the center lines, also a diagonal line must be defined. Installation then proceeds from the center of the room diagonally towards the corners. Since the tiles may slightly vary in color, it is advisable to take them alternately from different packages.
Also the joint width is important: it should be at least 2 mm (make sure to observe the manufacturer’s instructions). Joints are able to compensate movements and tensions. Expansion joints are required where the floor meets the wall. After the tile adhesive has hardened, the joints are filled with a grout. Joints at the wall/floor interface are ideally sealed with a silicone sealant.
Tip 3: EMICODE® products ensure healthy living
To ensure that your indoor air is as healthy and pollutant-free as possible, it is best to use products that have been awarded the EMICODE® eco label (e.g. tile adhesives, grouts, sealants). Only building materials with the lowest possible emissions are allowed to carry the EMICODE® EC 1 seal on the packaging. For more than 20 years now, the GEV EMICODE® has been certifying building and installation products with regard to their emissions. Independent laboratories test the products for their short- and long-term emission of VOCs. Regular unannounced spot checks ensure compliance with the limit values on a long-term basis.

©Konstantin Malkov/123rf.com
Haben Sie Fragen?
Sollten Sie Fragen zu bestimmten Themen haben oder wollen uns aus einem anderen Grund kontaktieren, melden Sie sich gerne über Telefon oder E‑Mail bei uns.
Tel.: +49 211 / 843 449 – 01
info@emicode.com
Share article on Social Media:
